I still needed to film a sequence for my show reel so I decided to film John cooking up a feed. I'm not entirely happy with the final result but when I compare it to my grainy news shooting footage I can see the improvement. I wanted to achieve a nice soft key light with rim lighting. I used some tinfoil in place of a reflector where needed. Here's some screenshots.
For my Filmed Drama Project I decided to shoot my Tableplay 'The Date'. I wasn't happy with the script in the end but I decided it didn't matter- I need to just focus on the look of the film.
Pre-production:
For my lighting I planned to use Fren-L, Pro and Rifa with difs to soften the light. Due to the set up of the room, one light will probably need to be bounced from a wall to achieve fill light. Reflectors will also be used in the MS and MCU's of each character.
As far as storyboards go I storyboarded the whole script. I'm actually not concerned whether the actors choose to follow the script word for word, so long as the actions are there for me to get the shots I need. Because I have extra storyboarded shots than the number of set ups I need I plan to just do what I can, any if things end up working out differently once I get the actors into the space then so be it.
Scene1 Storyboards
Scene 2 Storyboards pg1
Scene 2 Storyboards Pg 2
Scene 3 Storyboards.
I also created a shooting order that I will follow the best I can unless something comes up or a better order presents itself.
In the week leading up to the shoot I had some panic as I hadn't found an actress yet, or heard back about location permission. As I was filming in my flat I had spoken to the property manager and written a letter for the owner, but they had wanted a copy of the script too so there was a bit of a hold up there. Luckily a few days later I found an Actress AND got permission on the same day!
Production:
On the night I had a small crew of 5 including me. I meant to shoot from 5-10pm but we went over time by an hour.
Photo by Dan DeLaet
I found that some shots on the night didn't work out as well as I had thought so I replaced a few shots, eg swapping an MCU for an OTS. Some shots I had intended to shoot on the tripod ended up looking better handheld as well. I also found that I didn't need the amount of shots I had planned to get the full coverage of the script as a large amount of the dialog became improv.
For our groups genre exercise I ended up with the end sequence of the film- the fight scene.
I knew already that a decent fight scene of 45 seconds would need many more than 6 shots due to the fast pace and quick editing that action scenes call for. However for the purpose of our presentation I thought about the shots that might go into a fight scene and storyboarded a few shots out.
With these storyboards I thought about dynamic shots, Close Ups, and the use of the Wide and Close up in the initial standoff. I worked under the assumption that these would need to be changed once we
had our actors sorted and could work out some choreography which would
suit their capabilities.
I planned to film all of the fighting using the shoulder mount, with a 90 degree shutter angle to cut down on some motion blur. Speeding and Slowing the footage would need to be done mostly in post-production because of the limited fps options of the Black Magic.
After some thought I decided to attempt one shot at 30fps to be interpreted at 25 fps to try and achieve a subtle slow motion.
Here's some clips I looked at to help me figure out my shooting intentions.
I watched a few more short films a while back and tried to pay extra attention to the cinematography and storytelling. I think I'm slowly beginning to notice more when I watch films.
Where do Lilacs Come From is visually stunning and well told, especially with such a difficult topic.
Cinematography wise this film was stunning. The transitions between reality and memories and between different scenes and characters was really well done and looked carefully planned out. I wasn't impressed with the swirling abstract VFX brain moments, not because they weren't stunning but because I didn't really feel that they added anything- they seemed to me to be like a fullstop, simply there to separate two scenes.
I would think this was a difficult topic, and the narrative approach which almost showed the film through to points of view was interesting. If the film was taken in a different direction I think that the two POV narrative could have been pushed further to show the untrustworthiness (is that even a word?) and instability of memories.
Unfortunately I did have a moment of being pulled out of the film, because of one point of implausibility. The camcorder. Would an adult still have the same camcorder that he had as a child? The film shows that this character must have a passion for recording his own life as he has continued for so many years, surely he would have worn it out, dropped it, broken it or upgraded by that point?
Just a small point- but it did bother me regardless.
For our genre exercise we will be creating a short action film.
"Action film is a genre wherein physical action takes precedence in the
storytelling. The film will often have continuous motion and action
including physical stunts, chases, fights, battles, and races. The story
usually revolves around a hero that has a goal, but is facing
incredible odds to obtain it. "
(The Script Lab, n.d., para.1)
The Action genre is very wide and can include Action-Comedy, Action-War, Disaster Films, Action-Adventure, Superhero, Martial Arts etc. Generally the action genre is more about the pace and style of the cinematography and storytelling then the themes or setting of the film (Sci-Fi, Fantasy, Crime, Spy films etc can all be action films)
Like any genre, Action films come with their own set of cinematography conventions and visual clichés. Our group briefly discussed this the other day and listed quite a few of these. As a refresher this is what we came up with:
High Shutter
Quick cuts
Shaky cam/ handheld shots
Close ups -usually combined with fast cuts
Use of very wide shots
Slow Motion
POV's
Sweeping camera 180°/360°s
While researching action films I also came across the 'whip pan' which is often used in action films and can be seen in most of the below examples. The whip pan can be used as a transition to conceal a cut but also can be used to describe a rapid panning shot which follows an action. On occasion it can be used to double as a POV shot.
Here are a few film examples, looking mostly at fight and chase scenes:
The Raid Redemption (2011), Directed by Gareth Evans:
The Raid Redemption is an Indie Film which premiered at the 2011 Toronto International Film Festival. I haven't seen the film in its entirety but I stumbled across it while researching the action genre.
The above sequence uses of a large number of the cinematography techniques we had identified earlier, but also shows a couple we hadn't thought of initially. These are the 'whip pan' seen at 0:44 which follows the action, and also the use of a variety of shots and camera angles (bird's eye, worm's eye, dutch tilt) etc.
This sequence makes use of shaky, handheld camera for the majority of the shots. Not only are there a number of close ups the clip also demonstrates the use of the very wide shot at 0:37.
I'm not sure what has been used in terms of shutter in this sequence but judging from the motion blur I'm guessing that it is not an especially tight shutter angle.
The Bourne Supremacy (2004):
Shot angle variations (birds eye view at the start is one example), shaky cam, quick cuts and close ups are among the cinematography techniques used in the car chase scene above. There are also a couple of POVs but they are cut so quickly that it isn't obvious (2:07), and a short "Whip Pan" at 1:01.
The Bourne Ultimatum (2007):
I decided to look at another Bourne example as this one is a foot chase and fight scene. The shaky cam doesn't seem quite as erratic as the car chase from The Bourne Supremacy and this might be in part because of how it is inter-cut with steadier footage. Once again close ups and variations in camera angles are used a lot throughout the clip.
This scene also includes slow motion shot which we often associate with Action films (1:13). The whip pan is also much more obvious in this sequence than the previous and is used as a transition at 1:02.
Hot Fuzz (2007):
While the previous examples show the genre conventions clearly, they are both serious films. This isn't a necessity for an action film. Hot Fuzz (2007) for example is an Action-Comedy, which parodies a lot of the conventions of an action film.
Even though they are parodied cinematography techniques can be clearly be seen in the above clip: whip pans, close ups, extreme wides, fast cuts, slow motion, handheld etc. At the end of the clip (2:44) another of the techniques we identified which didn't show up in the previous examples can be seen, the camera 360°. It's pushed to the extreme here due to the nature of the film but is often played straight in other action films.
Another important note to make here is about lighting. Action films aren't defined by the lighting used any more than they are by the setting and this is illustrated quite clearly by the differences in the style of these films. The lighting has been chosen to enhance the mood of the story, so it is obvious that a serious action film will use lighting with stronger contrast than one with a comedic tone.
Just a last minute study session. I typed out everything I could remember about each topic without checking my notes, so here's hoping I've remembered correctly. Exam starts after lunch today!
Focal length and Field of View:
The focal length is the distance between the center of lens and the sensor. Camera lens lengths are usually specified in mm.
The Field of View refers to the extent of the observable world that can be seen at any given moment. In this case- how much can be seen in frame, or how much the camera captures.
Field of view is connected to focal length through angle of view. A smaller focal length results in a wider angle of view. This then results in a larger field of view.
If the focal length is changed the angle of view also changes, resulting in a different field of view.
Kelvin Scale and Colour Temperature:
The Kelvin scale was created by Sir William Thomson. It uses a scale from absolute zero- which Thomson defined as the point where molecules stop moving. In his experiments Thomson heated carbon and watched as the colour changed from red to white-blue at it's highest temperature.
This is why the hottest temperatures on the kelvin scale are sky blue at 10000K.
In cinematography Kelvin is used for lighting and determining the colour temperature.
It is typically used in white balancing, which determines the overall temperature of an image, and allows the camera to identify colours correctly. If footage looks too yellow then the White Balance temp is too high. Colour temperature can be manipulated to alter the mood of the film. Principles of Shutter:
One type of shutter is the rotary shutter, which is found in film cameras. Rotary shutters have a disk which rotates in front of the film gate to allow the film to be exposed. Some rotary shutters allow the shape of the shutter to be altered. This is called the shutter angle. The standard shutter angle is 180°. Changing the shutter angle will cause different effects on your footage. A smaller shutter angle: eg 90° will have less motion blur and result is a sharper image. It will also allow less light to enter the lens effecting the exposure of the film. As the angle decreases further is will give the footage a stuttery, stop-motion look.
In digital film a shutter angle of 180°= a shutter speed of 1/50. Shutter speed refers to how long the frame is exposed for. A standard rule of thumb is that the shutter speed should equal twice the FPS, but this can also be altered for different effects. A faster shutter speed eg 1/30 will result crisp, choppy footage with reduced motion blur, while a slow shutter speed (1/400) will result in a less sharp image, with lots of motion blur and smoother motion. As with shutter angle, shutter speed also affects the exposure of the film, with longer shutter speeds make the footage more exposed.
Aperture:
Aperture is the hole in the lens which lets the light through. It refers to how open the lens of the camera is, and is represented in F-Stops. The smaller the F-Stop (Eg F1.4) the larger the aperture.
A small F-Stop allows more light to enter the camera resulting in a smaller depth of field, less overall sharpness and a more exposed image. Opening the Lens by 1 F-stop doubles the amount of light that goes through. Reducing the F-Stop by 1 halves the amount of light.
Disadvantage of a very small aperture= a decrease in sharpness because of diffraction.
Disadvantage of a very large aperture= Distortions, Chromatic Aberrations, Optical Vignetting
Different lens don't allow the same amount of light through even if they have the same F-Stop. T-Stops measure the amount of light going through a lens. T=F/ Lens Transmittance %.
Inverse Square Law:
Inverse Square law states that a physical quantity or strength is inversely proportional to the distance from the source.
In cinematography this relates to the relationship between the intensity of the illumination of a subject and their distance from the light.
I= 1/D²
If the distance between the light and subject is double the intensity will be 1/4 of the original. A 2 stop loss of intensity will occur every time the distance is doubled.
An example: If the light in it's initial position is one meter from the subject then its intensity is at its most powerful. If it is moved 1 meter further back distance=2. 1/2² = 1/4= 1/4 loss in intensity. Of the light is moved another meter distance=3. 1/3²= 9= 1/9= 1/9 loss in intensity.
Lux and Illuminance:
Lux is SI unit of Illuminance. It can be measured using a light meter but these mostly use foot-candles instead. I can't remember much more off the top of my head about it, so I will want to avoid this topic in the exam.
We started on the group News Shooting exercise a while back but I only got my final edit completed recently, so now seems like a good time to post about it.
In interviews there were a couple of points we talked about before filming:
B-Roll:
B-roll refers to narratively coherent sequences which are useful for telling stories visually as well as breaking up the to monotony of interview footage. This helps to draw in the viewer.
Eyelines:
Another tip for Interviews was to do with the subjects eyeline, which should be near to but not directly towards to camera. Positioning your Interviewer near to the camera is one way you can achieve this.
3-4 Sec Rule:
The 3-4 second rule is about shooting economy. Shooting Economy is the ratio between the amount of footage shot and actually used in the edit. When editing B-roll together it is likely that you will only use 4-5 seconds at the most. This means you can move through B-roll shooting quickly as you only need to roll on a few seconds.
It's important to have shooting discipline and to know in your own mind what you are shooting.
My Interview:
When I filmed my interview I decided to go for a 3-point lighting setup. I didn't want flat lighting in my interior interview, and I am quite happy with the look of the lighting. Unfortunately when I came to editing my footage it was really, really grainy- which I hadn't noticed at the time of filming. (it looks nice while it's small!) I'm not sure why it happened, but I wonder if I just didn't have enough light in the scene.
Grainy footage mishap.
Things looked better in my B-roll sequence and I didn't end up with as much grain. I really like the lighting in both shots despite the issues..
B-Roll
In my B-Roll sequence there were other problems though and things I would do differently now that I have a bit much knowledge. I would definitely think a bit more about the composition of the shot above. I'd also want to frame out the wires in the and deal with the reflection off the Mac in the back.
I was pretty nervous filming this as it was the first time I was using the camera for a sequence as opposed to just for exercises to compare the different settings, and I found myself a bit daunted by also the different things to think about.
Lighting Ratios are the difference in the amount of light from the key and fill. A higher difference will give more contrast to the light and shadow, giving a Film Noir feel; while a lower difference gives more even and flattering lighting and shadows.
A lighting ratio can be used as a kind of short hand on set, and can be helpful when the same lighting needs to be set up again on another day.
Last week in Cinematography we looked at Exposure and a few tools that could be used to help you get it right. In this exercise we experimented with Auto-Iris, Zebras and Light meters.
Our in class exercise had us position our subject in front of a window, with daylight directly behind them. We set up a light in front with a blue gel and then white balanced our camera.
1) In this first shot we used Manual Iris and set our Exposure by what was acceptable to our own eyes. My F-Stop in this shot was 4.
2) Next we set the camera to Auto-Iris. When we expose for a shot, getting a good exposure on the subjects face is our priority. As you can see in the screenshot below Auto-Iris wasn't ideal when it came to this as it took all of the background and surrounding light in the frame into consideration.
3) In Auto-Iris still we zoomed into the subjects face, switched the camera to Manual, and then reframed. This gave a much nicer exposure to our subject.
4) For our fourth shot we turned on Zebra's on the camera. In Manual Iris we overexposed our subject to show Zebras, then closed the aperture until the zebras had disappeared.
5) This shot was exposed using the Light Meter. We took a reading of our subject, then set our exposure accordingly.
6) For our final shot we opened our F-stop 1/3 above the previous exposure. On the Sony we had to open to 3.4 as it could not open 1/3 stop.
I've made a point of trying to watch some non-dialogue films over the last month. Here's a few that I've seen recently. It's kind of difficult to find films without dialogue unless they are animations (which often don't have dialogue), as often this isn't something a film is tagged by.
Visually beautiful. Even as someone new to film I noticed the nice camera work and compositions. The story is quite abstract, but is emotionally effective- in no small part due to the score.
This is a simple story about relationships and forgiveness. I thought that the simple stylistic choices suited the story well, and I was really impressed by the smoothness of the stop-motion animation. In the absence of dialogue, the music was used to portray the emotional context of each scene. While heartstrings is a neat little film, I felt that the story and solution is pretty cliched.
In the Lowell Kits there are three different lights: Fren-L, Rifa and Pro. For this exercise we filmed a shot lit with each light in turn to compare the look and intensity of each light. We filmed the Fren-L lighting first and set the Aperture to correctly expose the footage. Once the aperture was set we didn't change it for any of the other lights. You can see clearly from these screenshots the differences in each lights intensity.
Fren-L
Pro
Rifa
Rifa + Dif
Rembrandt Lighting:
Rembrandt Lighting is a flattering lighting named after Rembrandt Van Rijin. It is often used in studio portrait photography. A key aspect of Rembrandt lighting is the triangle of light that is created under the subjects eye
Three-Point Lighting:
Three-Point lighting uses
1) Key Light => Primary Light Source
2) Back Light (Rim) => Provides Separation from background
3) Fill Light => Fills in shadows on face, preventing harsh shadows
Sometimes additional lights called 'Kickers' are used to provide definition to background elements. but they aren't part of the Three-Point Lighting plan.
Low Key/ Three-point Lighting Exercise:
Lighting exercise
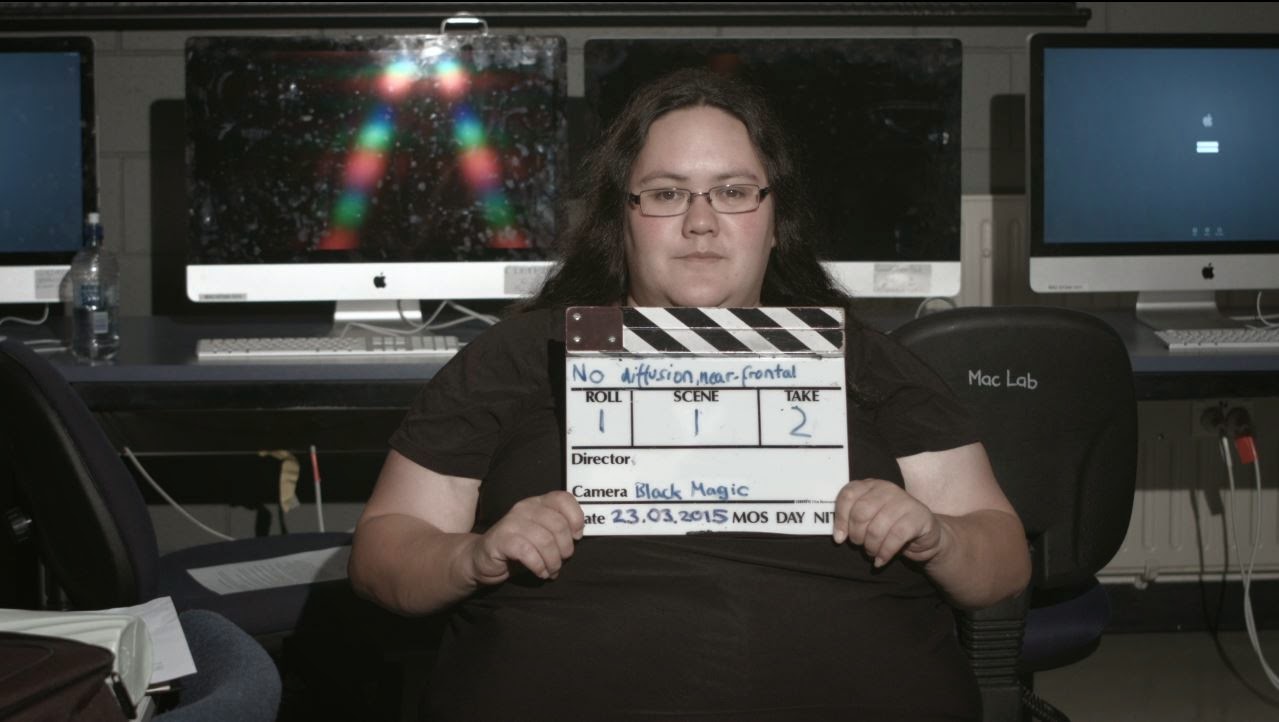
1. Fren-L only, no diffusion in near frontal position
2. Fren-L only, with diffusion, in near frontal position
3. Fren-L only, with diffusion, in cross-light/ Rembrandt position, angled directly at subject
4. Fren-L only, with diffusion, in cross-light/ Rembrandt position, angled perpendicular to the camera
5. Fren-L in previous position. Add a reflector in fill light position
6. Fren-L only, with diffusion, in interview position
7. Fren-L in previous position. Add Prolight, without diffusion, in a back/rim-light position. Do not change F-Stop from previous.
Adjust F-Stop for correct exposure.
8. Fren-L and Prolight as previous. Add Rifa, without diffusion, in fill-light position.
9. Keep Fren-L and Prolight the same. Add a diffusion to the Rifa and change position of light if needed
Interview lighting exercise:
For this exercise we were asked to film a nice-looking interview.
MCU
Longish Lens (not at widest)
Good Lighting - three-point diffused. Wide Light Source
Flags and C-Stands- to cut out any unnecessary spill.\
Focus, WB, Aperture, Gain, Exposure, Tripod
Background
Depth (Bokeh)
Perspective
Composition
Framing
F-Stop- Widest. (ND Filter, Shutter Speed)
1) 3 point lighting set up, using Fren-L, Pro and Rifa with no diffusion. We realized that we had left the Polarization filter on the camera after this.
2) The same lighting set up, without the polarizer.
In Cinematography class this week we have been learning about lighting. Lighting can be used to set the tone and enhance the mood of a scene, so is quite an important consideration when thinking about the visual style of your films. Two styles of lighting are High and Low Key Lighting
High Key Lighting:
bright
lack of shadows
low contrast
lighting ratios are small, reduced
High Key Lighting was used commercially in early TV as film stock couldn't handle high contrast, and it is now commonly used in Comedy and Musicals. Used in the TV series Friends, high key lighting helps to enhance the lightheartedness of the series, and the lighting is consistent across the different locations and scenes.
High Key Lighting in Friends
High Key Lighting in Friends
The short film Apricot (2010) uses a mix of High and Low Key Lighting across its scenes. During the flashbacks there is a predominant use of High Key Lighting which differentiates the past and present time (also a soft focus and colour grading further enhances this). High Key Lighting gives these scenes a sense of innocence. The difference is subtle as some contrast is maintained so this isn't the most obvious example, but one that I felt used changes in lighting style well.
High Key Lighting. Apricot (2010)
Low Key Lighting. Apricot (2010)
Low Key Lighting:
Lots of shadows
Strong Contrasts
Dark, often highlights show form
Lighting Ratio is large (eg 8:1)
Chiaroscuro - the use of strong contrasts
between light and dark, usually bold contrast affecting a whole
composition
Often used for dramatic effect. In the animated film Sebastian's Voodoo (2009), low key lighting enhances the dramatic, somber mood of the film. By leaving the man in shadow we find him sinister and very quickly recognize him as the villain of this story. It gives the man an ominous appearance which enhances our emotional connection to the Voodoo dolls.
In this exercise we explored the effect of different focal lengths, shutter angles, and ND filters on Depth of Field. It was intended that we would alter the aperture to correctly expose the footage (also altering the DOF), however the area my group chose to film in wasn't ideal and we had insufficient lighting to really show this. Due to this I had to bump up the gain a lot, causing heaps of grain. The lack of light means that my footage is a really bad example and doesn't show that well what was intended in this lesson.
These are the screen shots from my footage. The last few screen shots show a shallower depth of field.